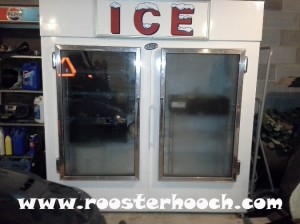
 I love re-purposing things, but even I’m impressed with this find. Well out of warranty and beyond it’s commercial “useful life”, this ice freezer was being discarded as scrap. Getting it home was anything but easy, it measures over 6 feet long. Tim certainly earned his dinner this night. We really weren’t sure of the condition of the compressor, so we took a few days to test the temperatures that it achieved after we got it home. As it turned out, all it needed was some minor adjustments and a good cleaning. The one major issue was not with condition, but functionality. Because it was designed to have bags of ice stacked inside it, there wasn’t anyway of organizing food and I didn’t want to just throw everything in there and hope that I could find it when I needed it. So we put our heads together to find a solution.
I thought it would be awesome to have all this extra space when I got good deals on bulk groceries, but the main reason that I wanted it was because Tim doesn’t always get a deer at the most convenient times. So when he does, sometimes we need to be able to store the meat safely until I have time to process it. I know some of you follow his Blog Suburban Outdoor Life, so you are probably familiar with the way we brine the meat in the 7 gallon buckets before we package it. So one of my main considerations in finding a shelving system was to ensure that there would be plenty of room for the buckets on the floor of the freezer. 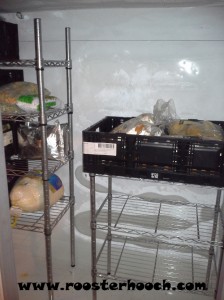 As you can see, these inexpensive stainless steel shelving systems really fit the bill as they allowed me to set the first shelf height just above the top of the bucket.
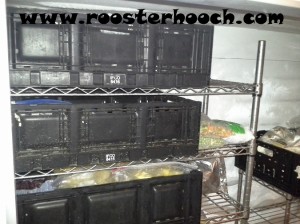
We set the rest of the shelves at a height that was perfect for using these black produce crates for organizing food. The warehouse grocery store that I frequent always has too many of these crates and they are happy to pack my order in a few of them to get rid of them. I must have 50 of them now in varying sizes. They are also perfect for organizing and storing my empty canning 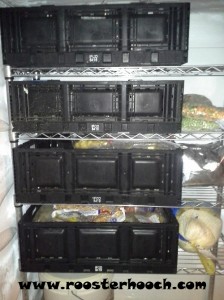 jars, but I digress.
Once we figured out the perfect sizes for the shelves that we needed and purchased them, then the fun began. You can probably tell that larger shelf is too big once assembled to go through the doors of the freezer, so we had to assemble it INSIDE the freezer. I really regret not getting a picture of Tim standing inside the freezer holding the shelves while I put the clips on the uprights. It would have been the perfect way to show the scale of this thing.
I have to say, it feels really good to have everything organized and easily accessible in my “walk-in” freezer. 🙂

